


You may have gathered that I just LOVE this set from Stampin’ Up’s Christmas catalogue. (You can view the catalogue by just clicking on the image to the right of this post). Honestly, I do have other sets, and I will share some samples using those in the next few days, but first another one from my FAVOURITE set.
This is another card from my Technique class this week, where we were learning to master the art of sponging. It was probably the most challenging as the area to be sponged took up most of the card, but everyone managed it with flair!
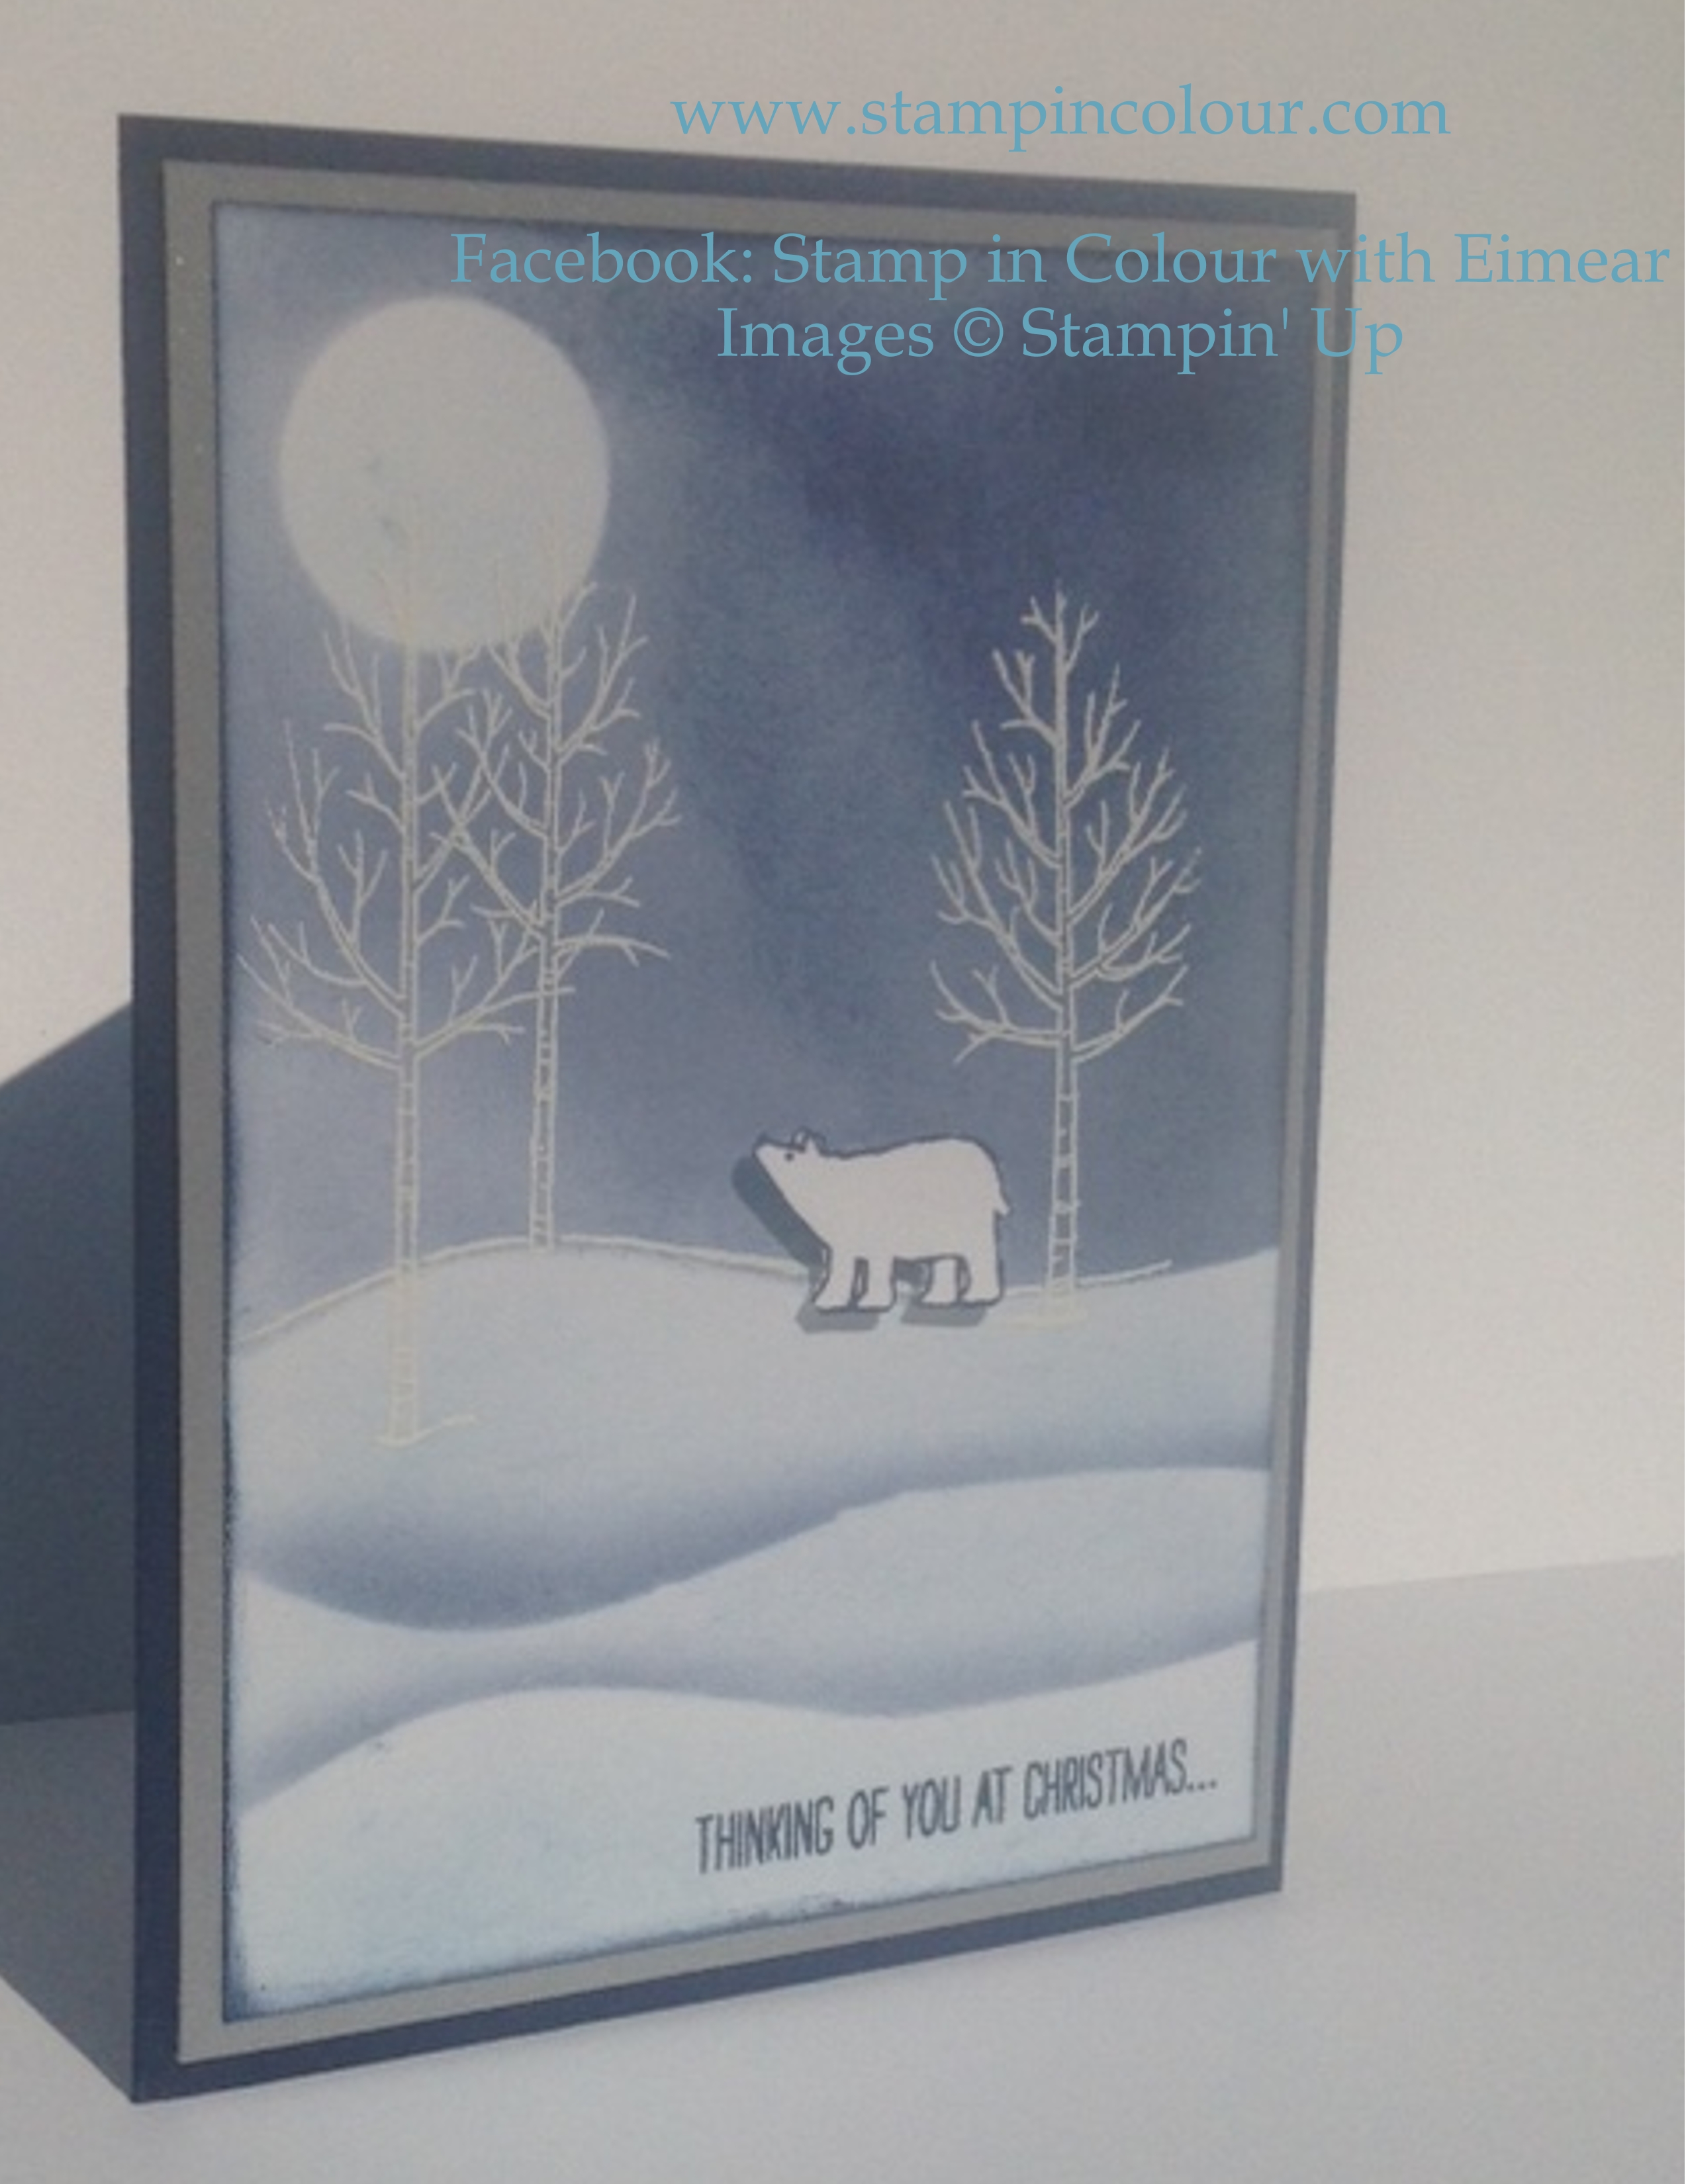
There are only two colours used in the sponging this time and the majority of the sky is done with just one colour, Night of Navy.
Again, like the last card I posted here, my advice for sponging is:
- to take off some of the excess ink on scrap paper first before taking your sponge to the card,
- start in circular motions from the outside in,
- and don’t put on too much too soon.
You can always build up your colour, but you can’t remove it once it’s down, so do go slowly.
For this card, I used my 1 inch circle punch to create a mask for my moon and used to my 2-way glue pen to stick it down temporarily. Then, I started sponging from right to left so that my left-hand side was a lighter colour as if lit by the moon.
I used the shape of the hills on the White Christmas set to create masks for my snow bank. I only put Night of Navy very close to the edge of the banks to create some definition and the rest of the bank was sponged with Marina Mist. The trees from White Christmas were heat embossed in white and I stamped and fussy cut my little polar bear, placing him between the trees so he’s looking up at the moon.
I hope you like the card, and hope it gave you some inspiration for your own Christmas cards. If you want any further help with the instructions, do get in touch, or if you need any of the supplies, just click on the images below.
Here is a list of everything I used to make the card.