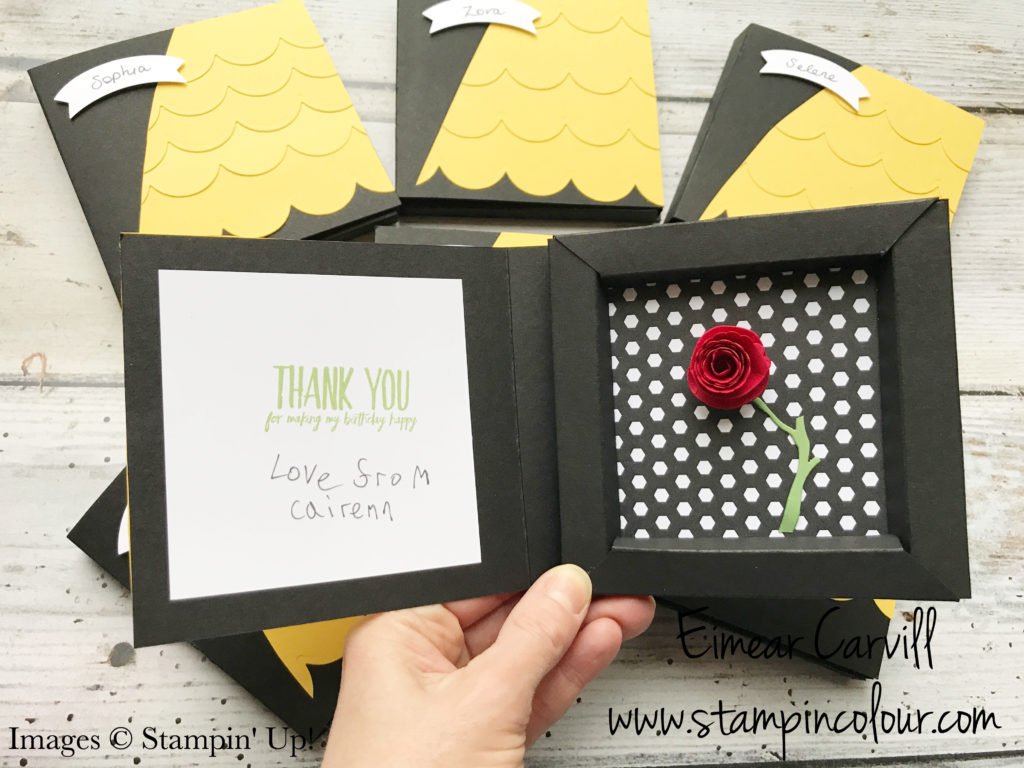
My daughter turned 6 a couple of weeks ago and had a Princess themed birthday party. As I’d just used the venue’s invitations, I decided to make some pretty special thank you cards for her guests. I created a Princess shadow box card that opens up to reveal a red rose and her Thank you wishes.

It was quite a simple card to create and I have to thank Danielle Bennenk, also known as Mrs Brightside, as I saw a shadow box card on her page a year or so ago. I’ve adapted her card slightly to fit my theme, but the basic measurements remain the same.
Princess Shadow Box Card supplies
- Shadow Box – Basic Black 21cm x 21cm
- Outer base card – Basic Black 11 x 24.5cm
- DSP – 9.5cm x 9.5cm
- Whisper White – 9.5cm x 9.5cm
- Scraps of Real Red for Rose, Wild Wasabi for stem and Daffodil Delight for Princess Dress
Princess Shadow Box Card Method
- Score the 21 x 21cm piece at 1.5cm, 2.5cm, 4cm and 5cm
- On one side, score from the edge to the second score line at 6.5cm and 14.5cm
- Rotate 180 degrees and repeat step 2.
- Cut out each of the 4 corners (measuring 5 x 5cm)
- Then cut along the score line at 6.5cm and 14.5cm to the and cut diagonally outwards to the 3rd score line
- Rotate 180 degrees and repeat step 5
- Burnish all the score lines
- Adhere the square of DSP measuring 9.5 x 9.5cm
- Roll in the 2 rectangular edges and fix using Tombow or Tear and Tape
- Once fixed, roll in the 2 cut away sides and fix as above.
- Score Base Card at 11.5cm and 13cm and affix box to base card.
This is the recipe for the basic card, I have then used my Princess theme to create a dress and a rose. However, you could use anything you want to decorate your card.
You can see all the steps I’ve used and how I created the Dress and the Rose in the following video.
To follow is a list of products I used to make this project. Don’t forget to use this month’s Rainbow Rewards host code at check-out to receive a extra little gift in the post from me.
Until next time,
Eimear


Love it, Eimear. And Thank you so much for the shout out!